Installing and Configuring VirtualBox
Oracle VM VirtualBox is the world’s most popular cross-platform, open-source virtualization software. VirtualBox enables you to run multiple operating systems simultaneously on a single physical computer, greatly facilitating testing, development, and learning.
Developers use VirtualBox to accelerate software delivery and testing, as virtualization makes it easy to create isolated environments for different operating systems. IT departments and solution providers leverage VirtualBox to reduce operational costs and minimize the time required for secure application deployment both on-premises and in the cloud.
Why do we choose VirtualBox for training purposes? There are several significant reasons. First of all, VirtualBox is easy to install and available for all major operating systems — Windows, macOS, and Linux. With a large user base and active community, you can always find solutions to common problems and comprehensive setup guides.
VirtualBox supports the creation and simultaneous management of multiple virtual machines running different operating systems, including Windows, FreeBSD, Ubuntu, CentOS, Red Hat, and many more. This flexibility enables you to model real infrastructures and gain hands-on experience with various platforms in a single environment.
The software is completely free and open-source. While VirtualBox is not suitable for enterprise-level or production environments, it is an excellent tool for learning and testing.
You can download the latest version of VirtualBox from the official website:
https://www.virtualbox.org/wiki/Downloads
or from the Oracle website:
https://www.oracle.com/virtualization/virtualbox/
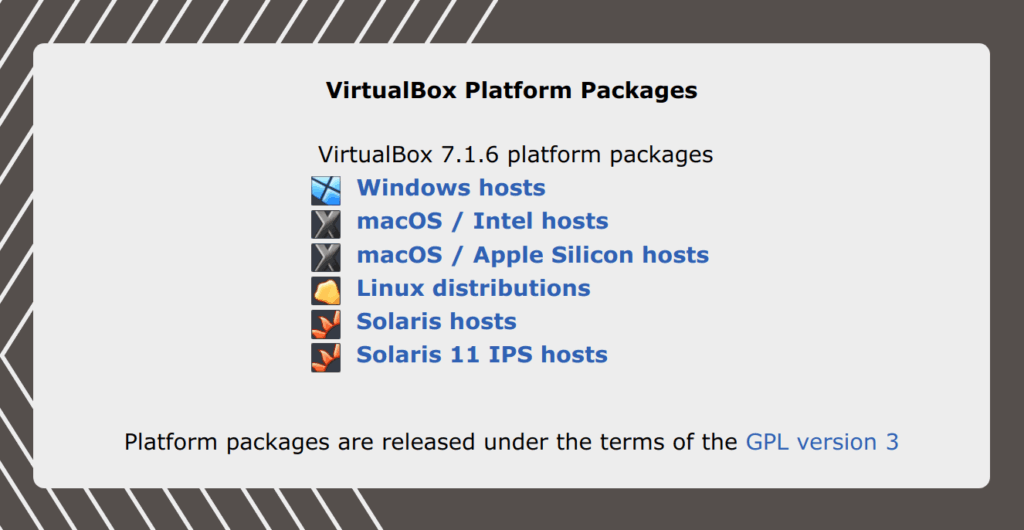
To extend the functionality of your virtual machines, it is recommended to install the Extension Pack — a set of useful enhancements that provide support for shared folders, USB devices above version 2.0, and other advanced features. The Extension Pack can be downloaded here:
https://download.virtualbox.org/virtualbox/
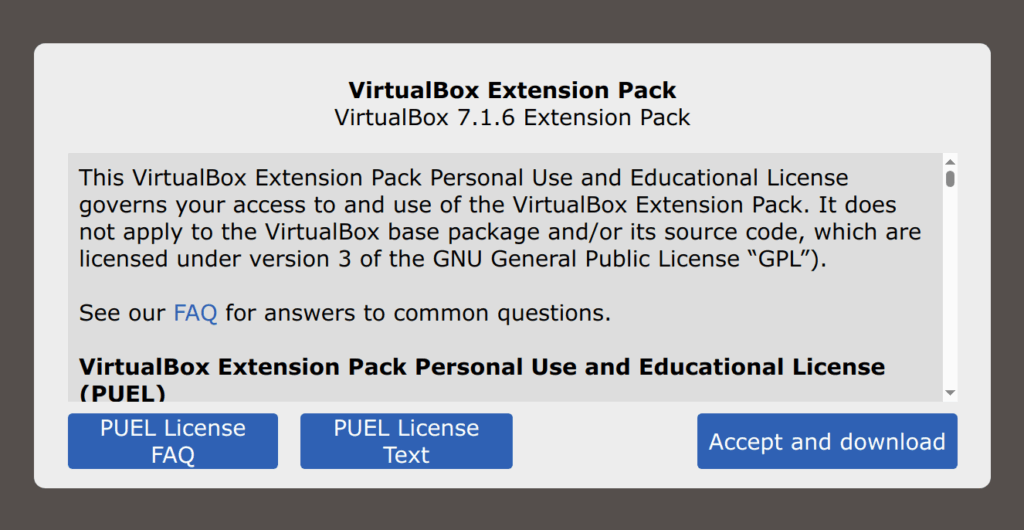
At the time of writing this course, the latest available version was 7.1.6, but you can use any current version 7 or higher.
Installing VirtualBox is straightforward and generally involves clicking “Next,” “Accept,” and “Finish” in the installation wizard. There is no need to describe each step in detail, as the default options are suitable for most users. For your reference, screenshots of the installation process will be provided below.
Pay special attention to two points that may be important, especially for beginners:
1) Before installing VirtualBox, ensure that hardware virtualization is enabled in your computer’s BIOS settings. This option is usually labeled as Virtualization Technology, Intel VT-x, AMD-V, or something similar. Without it, virtual machines may fail to start or run improperly.
2) During the installation, your PC’s network connection may temporarily disconnect — VirtualBox will notify you about this. This is due to the installation of virtual network adapters and requires no additional action on your part.
Once the installation is complete, you can proceed to the initial configuration of your virtualization environment and the creation of your first virtual machine.
To enhance the functionality of VirtualBox, it is necessary to install the Extension Pack. This package enables support for additional features, such as USB devices above version 2.0, shared folders, remote desktop integration, and other useful capabilities.

After completing the installation of VirtualBox, you can proceed to create your first virtual machine. In the main window, select the New button on the toolbar, or navigate to Machine → New in the top menu.
If you have a fresh installation of VirtualBox and no virtual machines yet, you will also see the New button on the application’s main page.
Below are screenshots illustrating both methods for creating a new virtual machine:
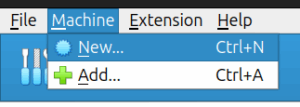
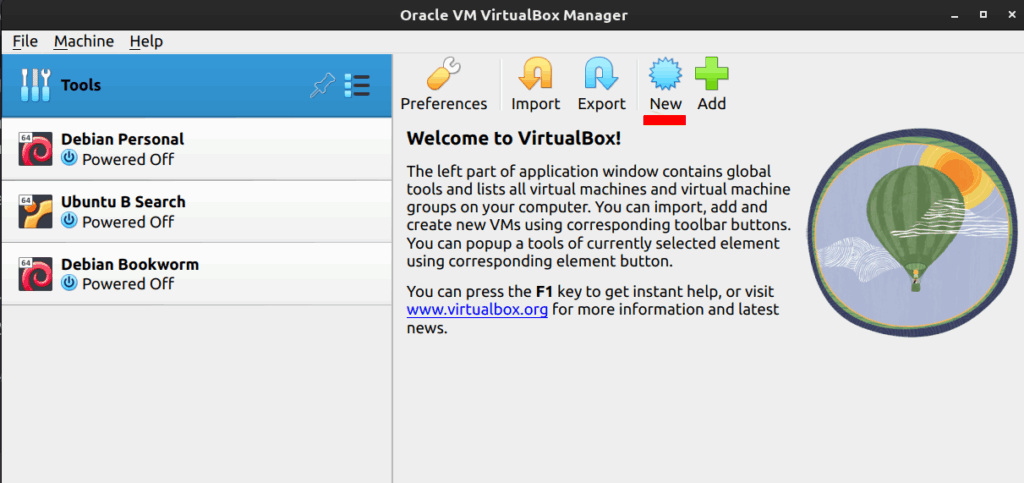
In the next step, you will need to specify the name of your virtual machine and the directory path where its files will be stored. On Windows systems, this path is typically located on the D or C drive, while Linux users often select a directory within their home folder or a dedicated partition. Choose a location that is convenient for you.
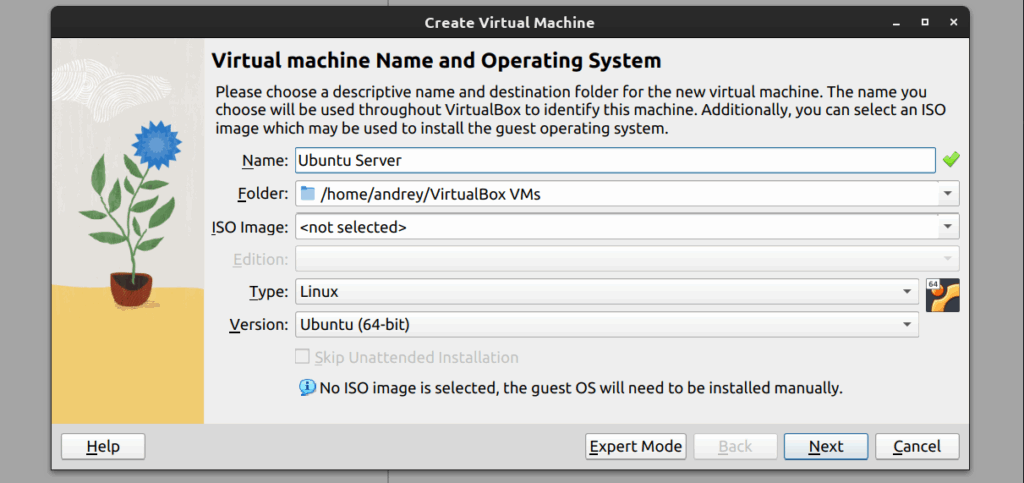
Next, set the main parameters of your virtual machine — primarily, the amount of RAM and the configuration of the virtual hard disk. It is recommended to allocate at least 1 GB (1024 MB) of RAM, as allocating less may result in startup errors such as Kernel Panic.
For the virtual hard disk, it is advisable to choose a size of at least 20 GB. This will be sufficient for installing Ubuntu Server, additional applications, and completing all training assignments within the course.
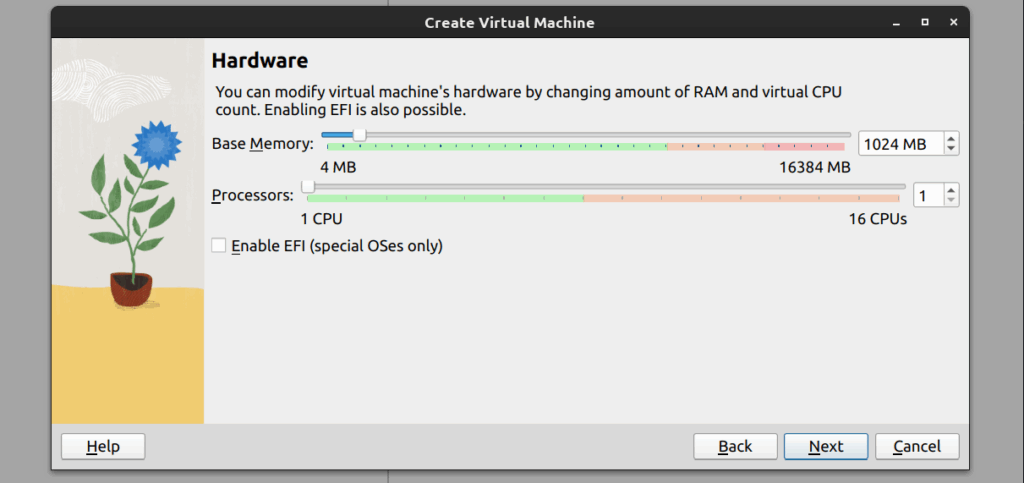
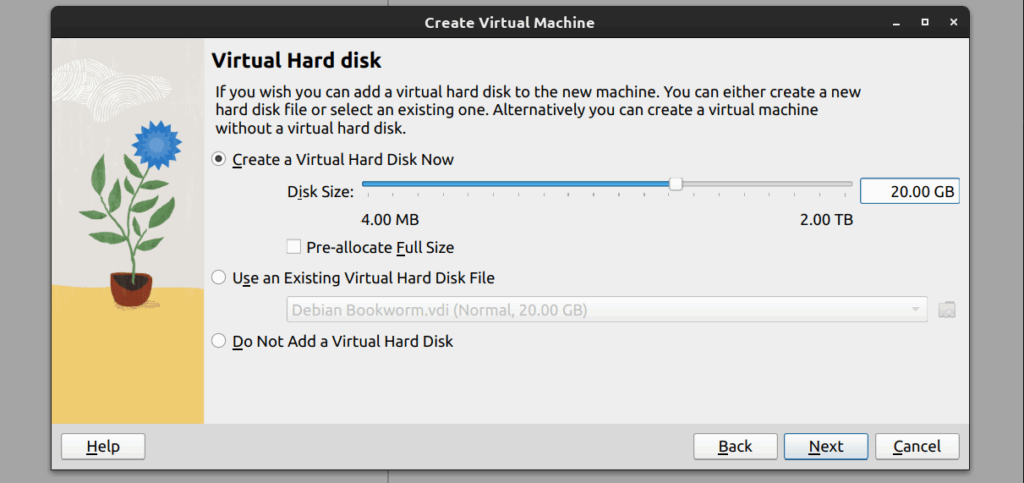
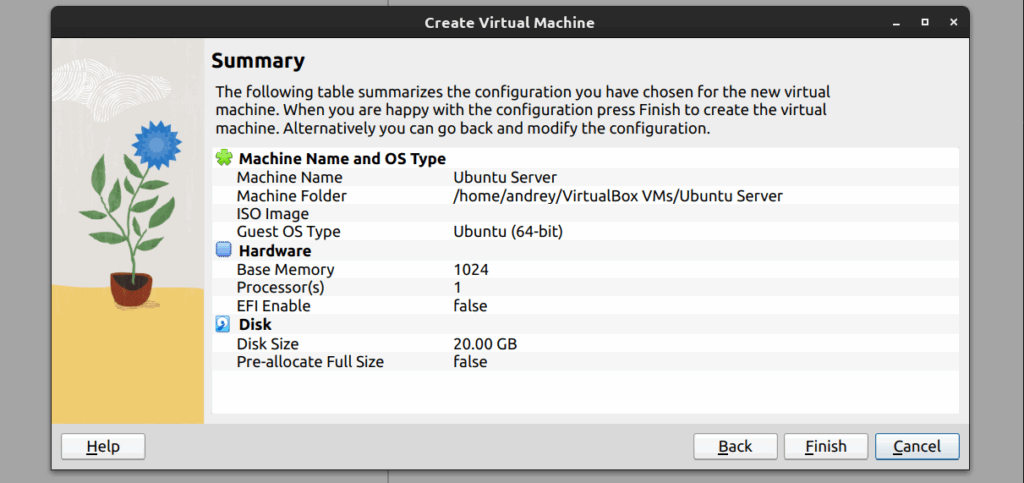
After entering all the required parameters, click the Finish button. Your virtual machine will be created and will appear in the list of available machines in the VirtualBox window.
